(Introduction, Syllabus, 1.Prelims, 1-4Precon, 2. Excavation, 3.Foundation, 4.Framing, 5.Close-In, 6.Roofing, 7.MEP, 8.Finish)
Siding installation begins by setting up a cutting and staging area for the work and clearing the site of debris or obstacles around the perimeter that might interfere with the scaffolding.

To minimize breathing the harmful silica dust that results when fiber cement siding is sawn with power saws, carpenters use shear or scoring tools to trim the material lengths to size(see James Hardie installation instructions).
Soffits and trim ready for siding
Since the siding must be nailed into the wall studs to secure it against possible wind loads, the work begins by locating the nails through the exterior sheathing and marking the vertical stud locations.
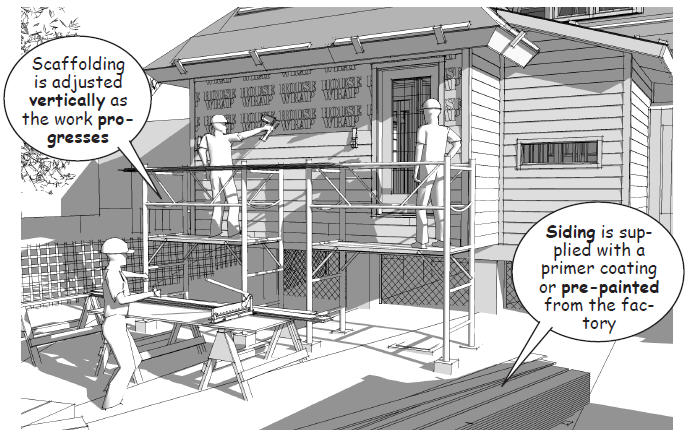
The siding is then cut to size and nailed to these stud lines in horizontal bands while maintaining a uniform spacing and exposure. Gecko gauges are able to clamp each row while holding the subsequent rows in place to control the dimension for the exposure.
Scaffolding makes it possible to adjust the work platform vertically and install the material safely and efficiently.

The joints in at the splice points and the ends that meet the trim around the corners and doors and windows are spaced for expansion. These joints are caulked to seal the gap prior to painting the exterior walls.
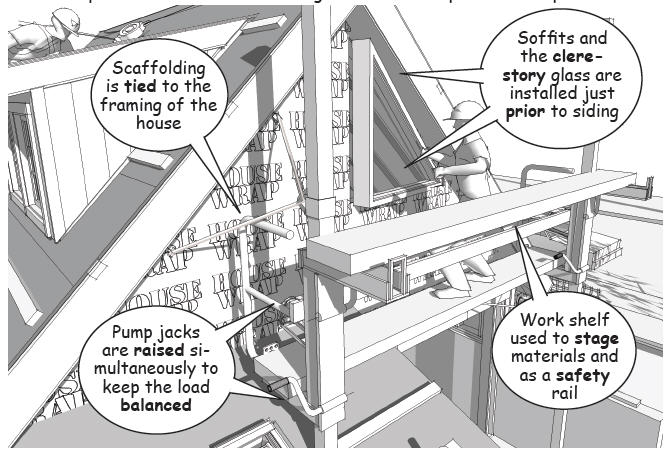
Safely installing gable siding and glass
Since stack scaffolding cannot be used to install the gable clerestory and siding, the pump jacks shown in the illustration are able to adjust to existing conditions. Important is that the base of the jack-poles must be attached to the frame of the building.
Since stack scaffolding cannot be used to install the gable clerestory and siding, the pump jacks shown in the illustration are able to adjust to existing conditions. Important is that the base of the jack-poles must be attached to the frame of the building.
In this example, the poles are attached to the framing above the opening for the prefabricated sunroom.

Fall protection requirements are part of the project’s safety plan. According to the US Department of Occupational Safety and Health Administration, fall protection and safety rails are necessary to protect the safety of the workers whenever the nature of the work or the height of a scaffold is greater than ten feet (see the OSHA training manual here).
.
(To be continued…)
---------------------------
The material presented in this series has been taken from our book, “How a House is Built: With 3D Construction Models” The book includes annotated illustrations, captioned text, videos, models, and the 2D Preliminaries.

.
