Once the temporary roofing is in place, doors, windows, insulation, and exterior finish materials are installed along with the final roofing to waterproof the shell of the building. Labor and materials must be carefully coordinated during this phase to complete these tasks efficiently, prevent conflicts in the schedule for the various trades, and ensure the safety of the workers.
Fall Protection and Construction Safety
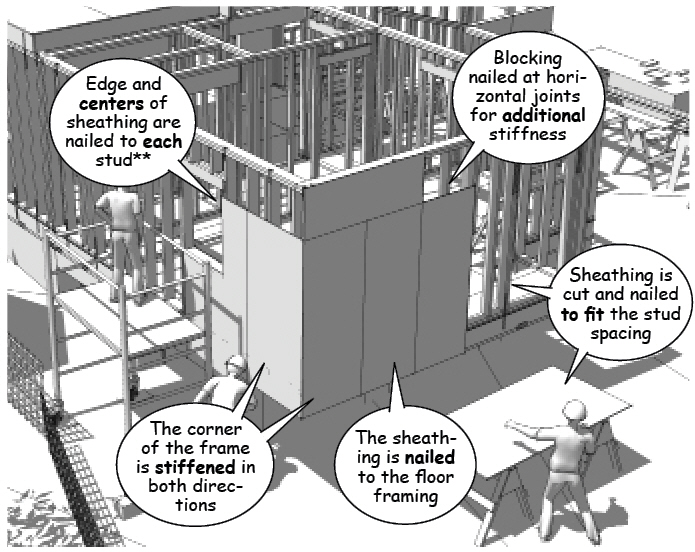
The traditional framing methods shown in this example mean materials are exposed to the weather for a longer period of time so care must be taken at the end of each day to protect them from moisture and deterioration.

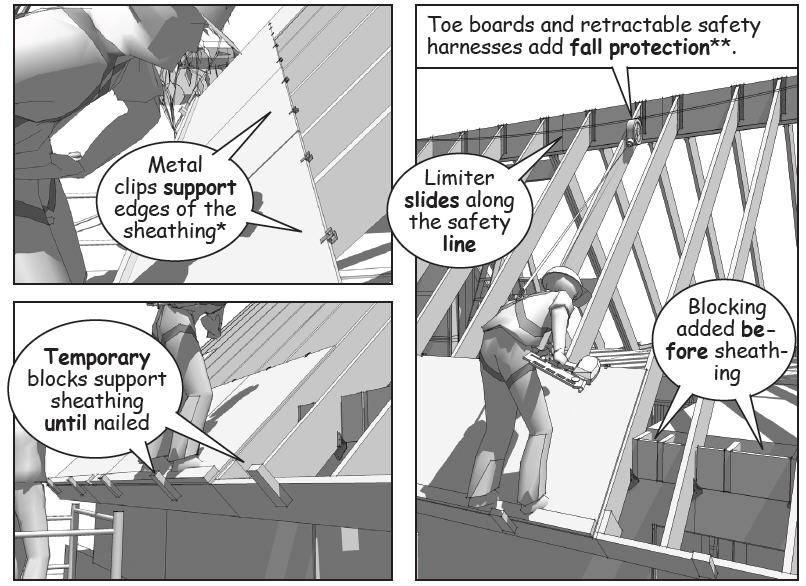
This longer framing schedule also increases the possibility of accident or injury, making construction safety and the use of proper equipment essential, even on simple residential jobsites.

Safety management includes fall protection harnesses, tether lines with limiters, toe boards, spotters, material hoists, ladder ties, scaffolding, and common sense.
Multitasking the Exterior Finishes
Careful scheduling is important to efficiently coordinate the multiple tasks and subcontractors working on the project during this phase.
Multitasking the Exterior Finishes
Careful scheduling is important to efficiently coordinate the multiple tasks and subcontractors working on the project during this phase.
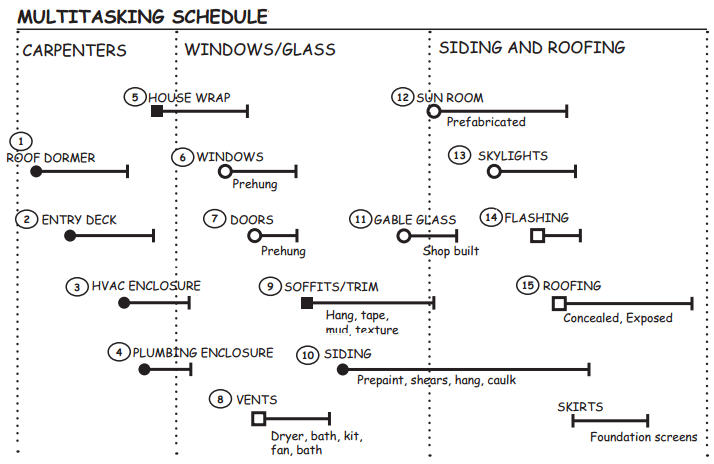
A simple bar chart helps visualize the scope of the work needed to complete the close-in. The length of the bar represents the estimated time to complete each task, and the horizontal position of the bar on the chart indicates its relative sequence and timing.
The Tasks Include
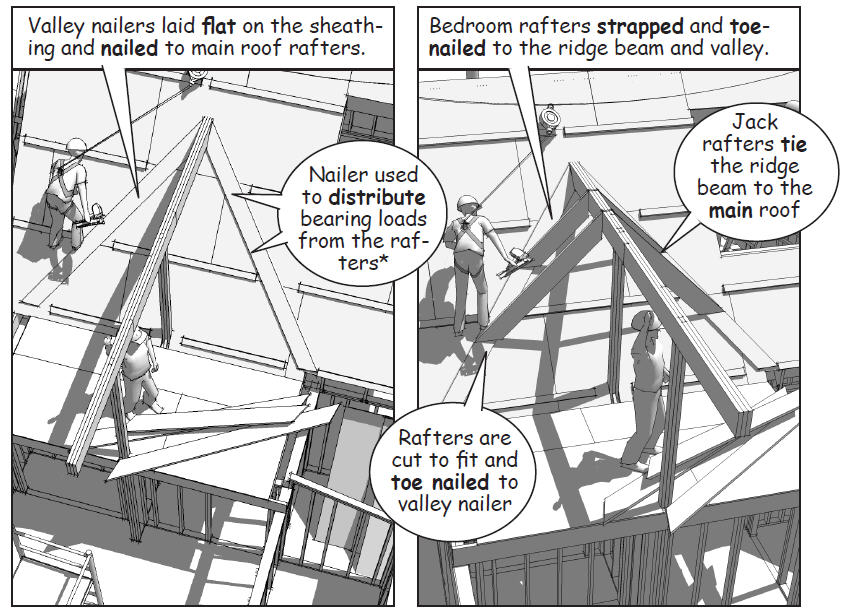
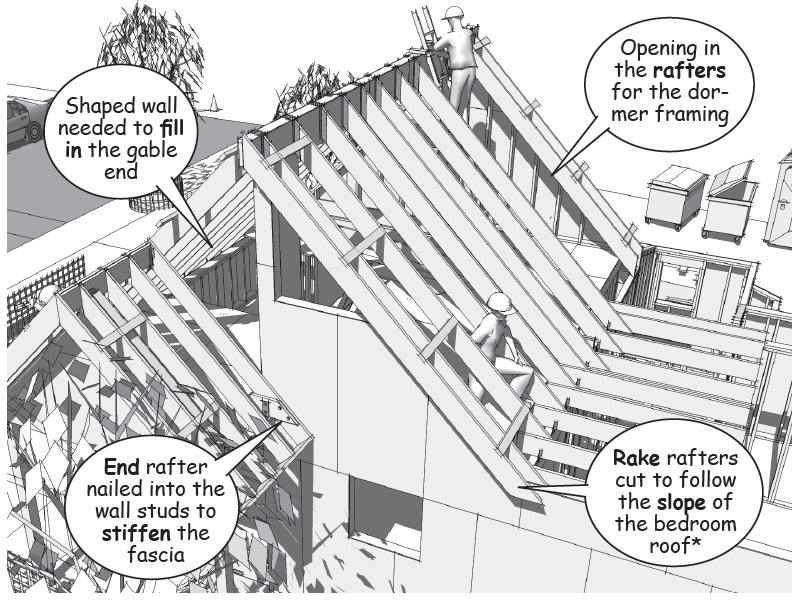
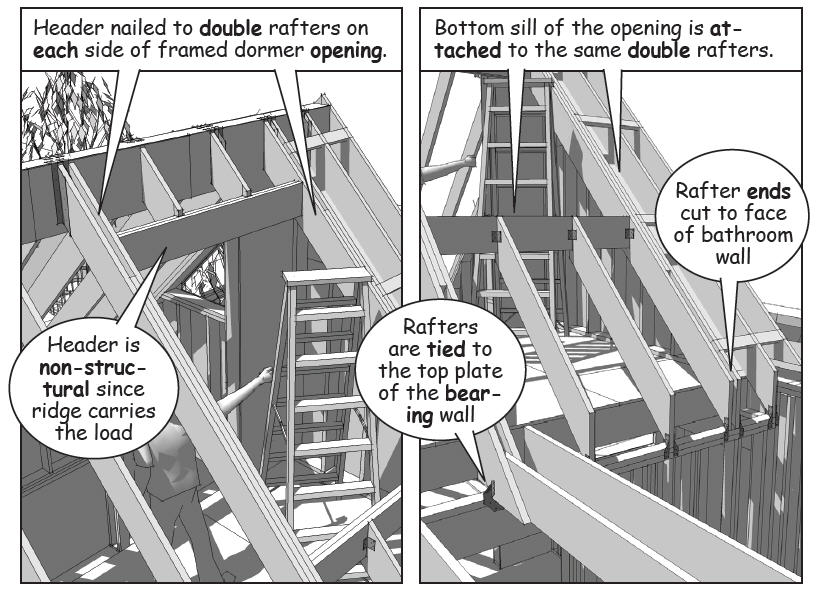
1. Finish carpenters: The work begins by completing the framing so that the exterior surfaces of the house can be wrapped with a vapor barrier and sealed with trim and siding.
The Tasks Include
1. Finish carpenters: The work begins by completing the framing so that the exterior surfaces of the house can be wrapped with a vapor barrier and sealed with trim and siding.
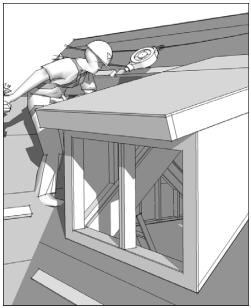
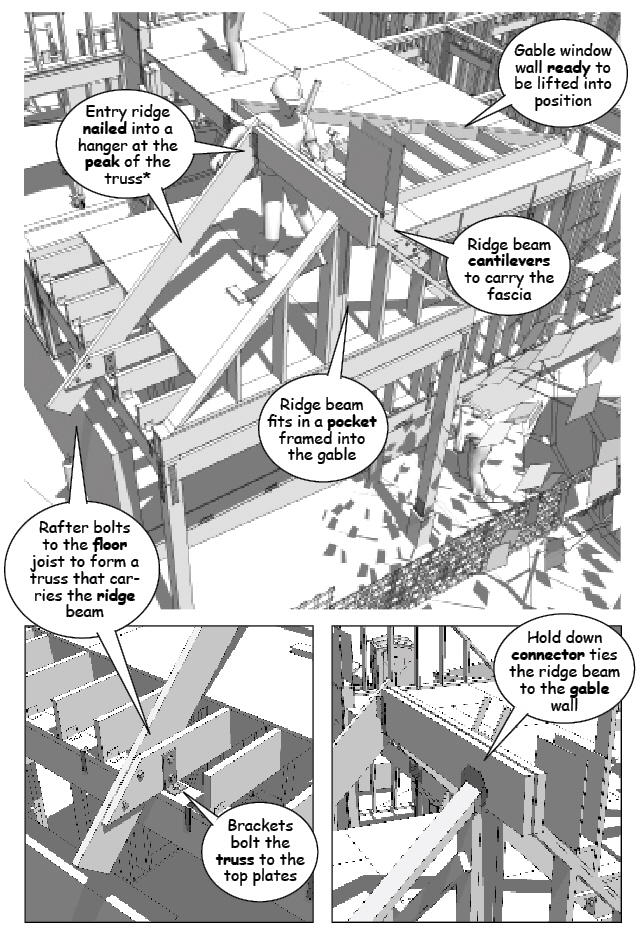
This includes the walls and roof for the dormer, framing for the mechanical enclosures, and adding nailers and blocking to support the trim, siding, and the flashing and roofing.
2. Doors, windows, and glass: Once the framing is finalized, a vapor barrier is rolled out and stapled to the sheathing to wrap the house. Openings are then fiber-taped to complete the seal before the doors and window frames are inserted and screwed to the rough openings (See also Dupont Flashing Systems).

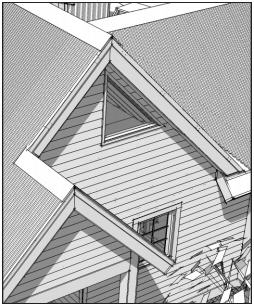
3. Siding and trim: Trim is then installed at the corners, base of the exterior walls, and around the doors and windows before the siding begins. In this example, a pre-painted cement fiber siding is shown set against the trim to protect the framing from the weather.
4. Finished roofing: Roof vents, skylights, and the prefabricated sunroom are finalized along with flashing for the metal roofing. Bathroom skylights and the sunroom enclosure are installed by the finish carpenters.
Two types of metal roofing will be illustrated in this example: the first with concealed fasteners and standing seams; and the other an exposed fastener system using special screws with neoprene washers. Both types of roofing are placed over sleepers and runners attached to the roof sheathing through the waterproof underlayment.
(To be continued…)
---------------------------
The material presented in this series has been taken from our book, “How a House is Built: With 3D Construction Models” The book includes annotated illustrations, captioned text, videos, models, and the 2D Preliminaries.

.