Tuesday, September 17, 2013

Part 7: Preconstruction: Installing Construction Utilities

(Introduction, Syllabus, 1.Prelims, 1.5Precon, 2. Excavation, 3.Foundation, 4.Framing, 5.Roof, 6.Close, 7.MEP, 8.Finish)

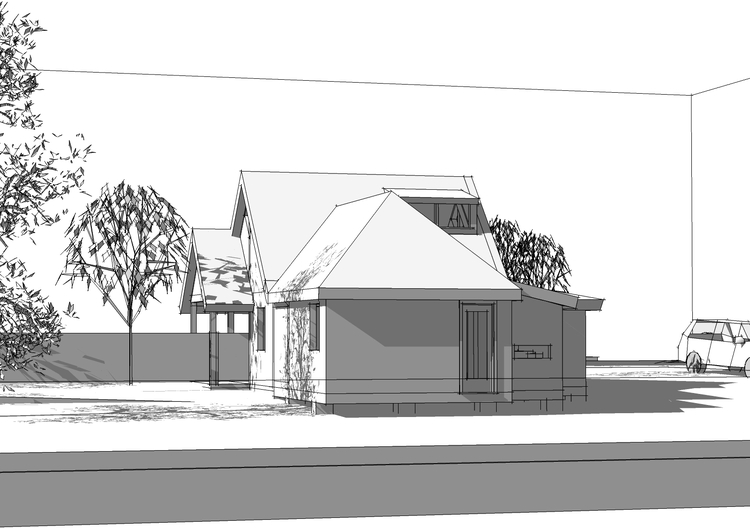
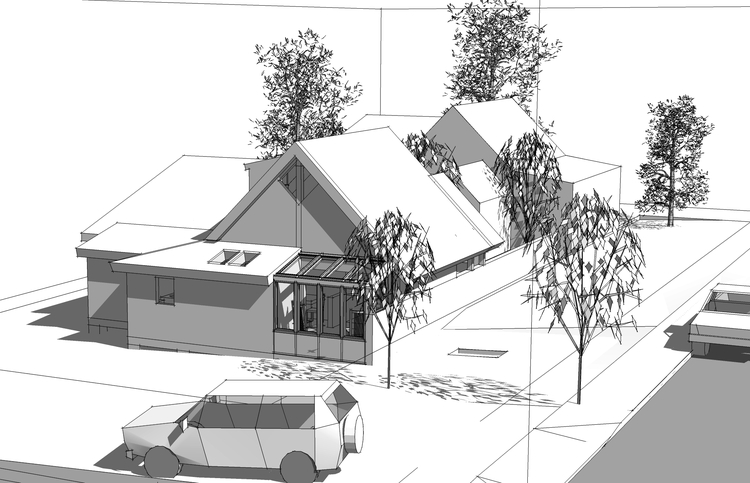
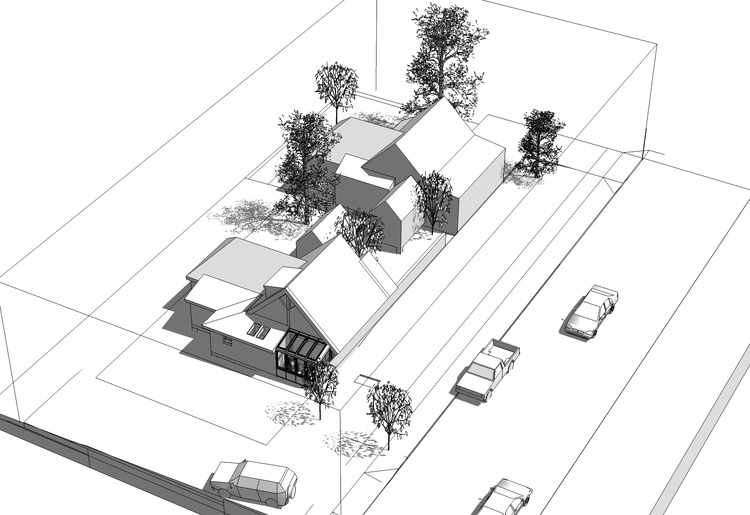
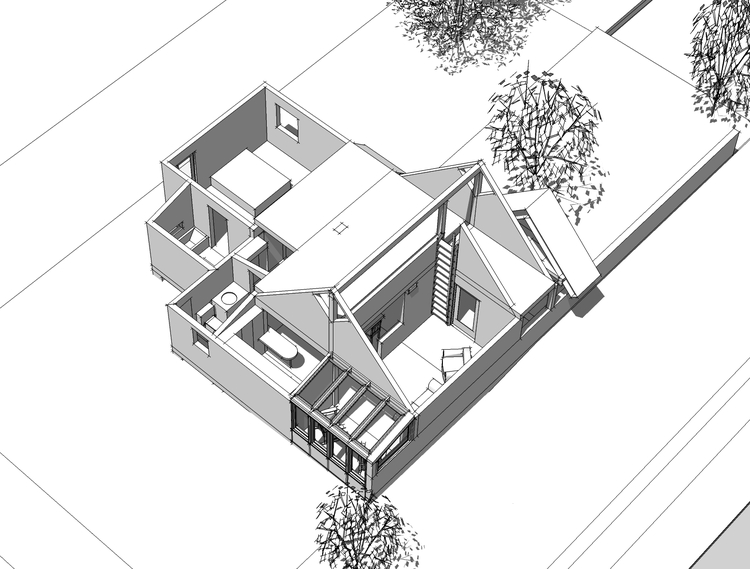
Site utilities for this project include their installation for the new house as well as connection fees and monthly payments for temporary power, water, and any other services necessary to complete its construction.  

Installing temporary power
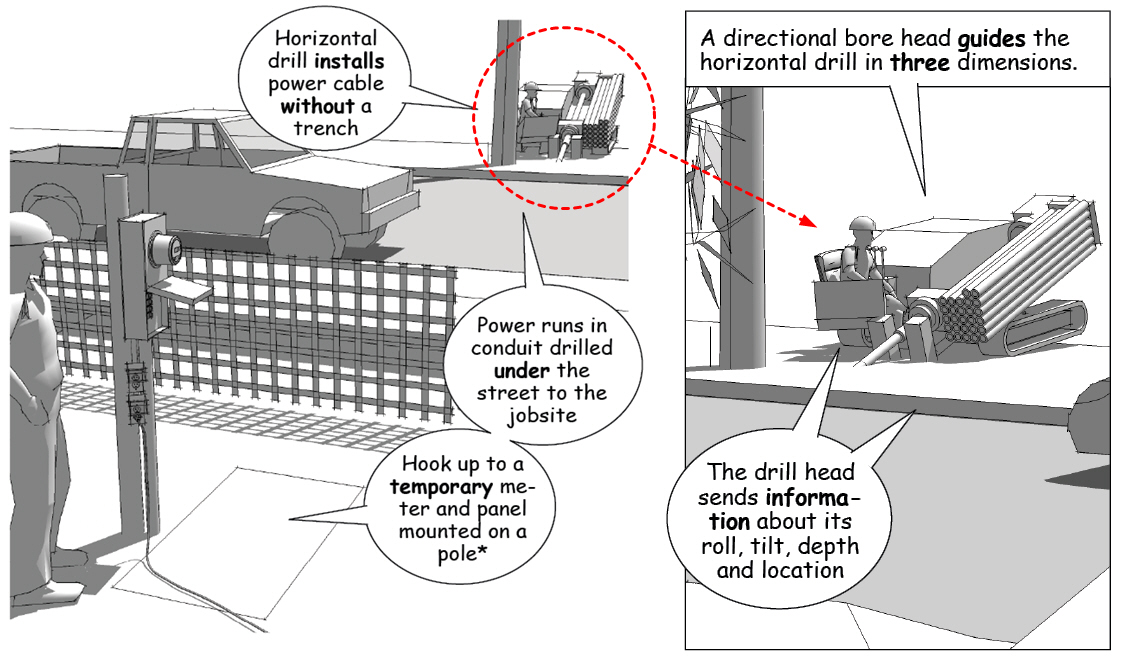
Power connections are made to utility lines that extend from a transformer capable of serving the building. For light residential construction, transformers are installed to supply several houses through metered connections that are turned on by the utility company that will be supplying the power.
Preconstruction Planning - Insitebuilders
Overhead supply lines drop from raised main lines strung across roads and public areas. Underground service must be installed in a protective conduit or a reinforced heavy duty cable that is then inspected for compliance with detailed specifications prior to burial.
Temporary Power - Preconstruction Planning - Insitebuilders
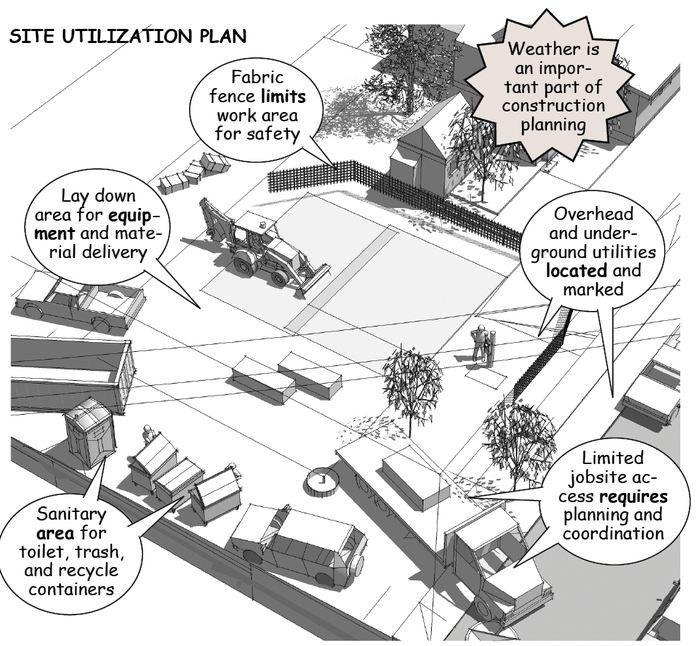
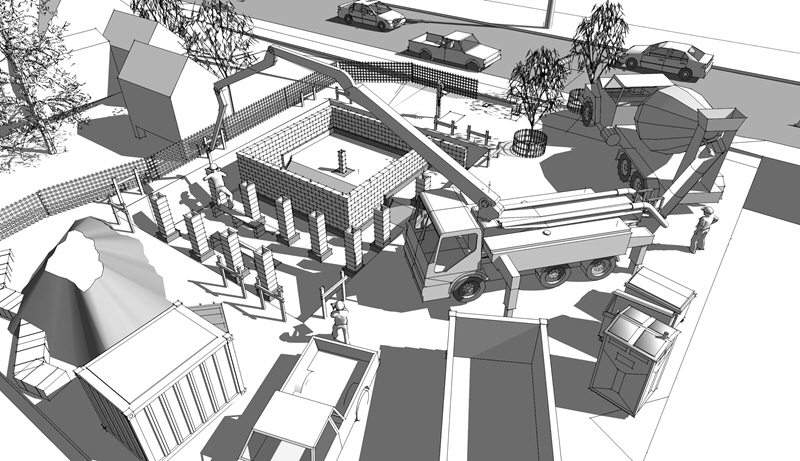
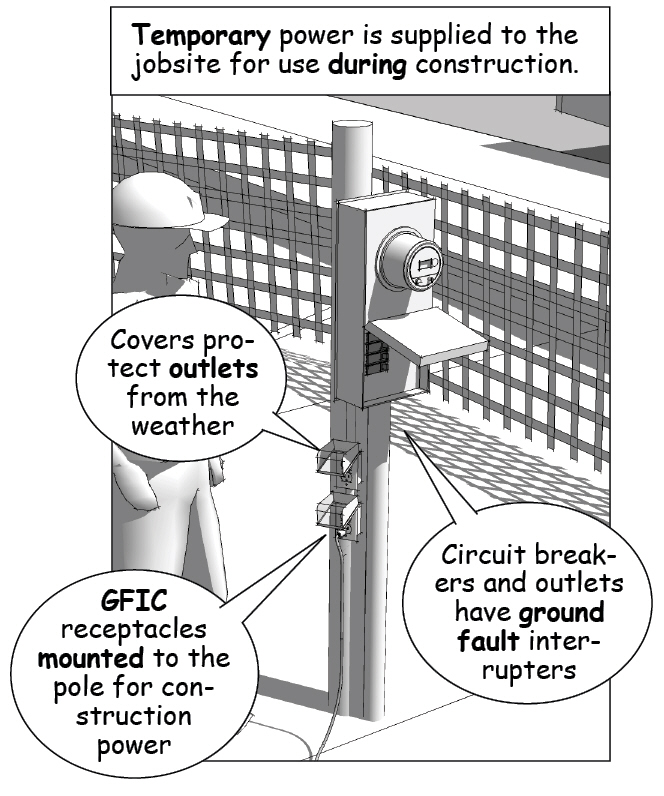
For the construction, a temporary power pole is placed on site according to the site utilization plan (SUP). The size, location, and grounding for the metered connection must again comply with local electrical codes before it can be connected.

Street cuts for utility installations
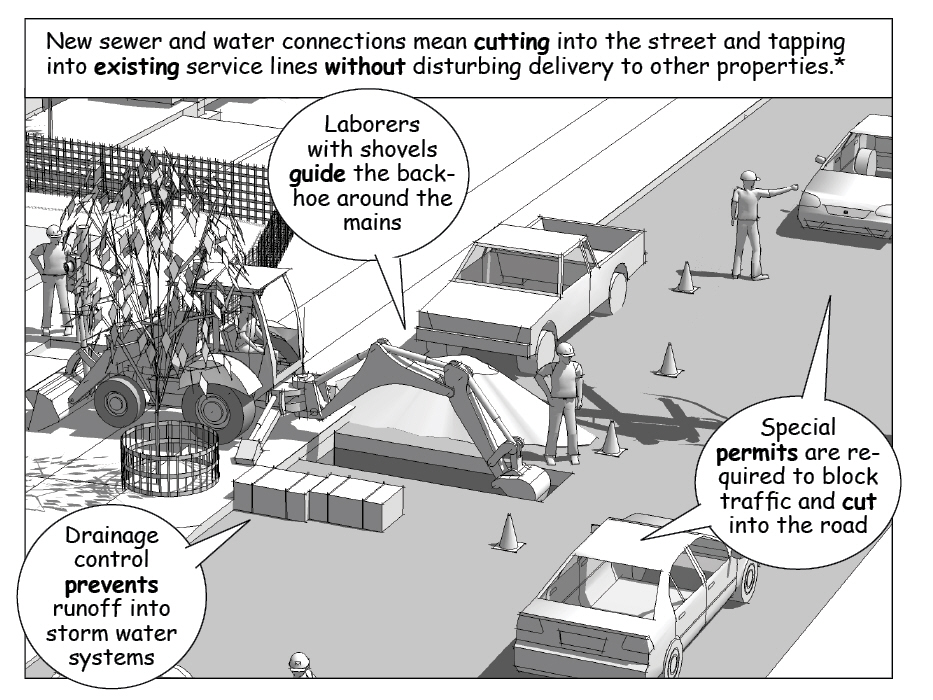
In some cases, utility taps must be made to manholes or underground service boxes that require a street cut. This is almost always the case for sewer, water, and gas connections.
Street Cu -  http://insitebuilders.com /blogimages/Blog130913/03StreetCut.jpg
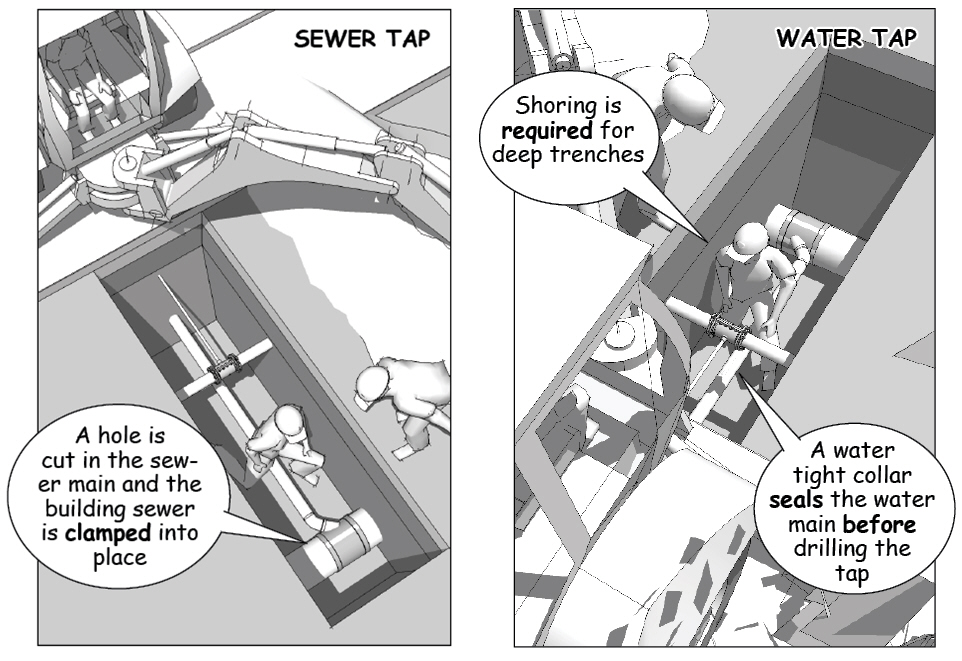
The extent of the work necessary to tap into utilities under a public right of way depend on the preparation needed to protect vehicular and pedestrian traffic, the location and depth of the mains, and the cost of repairing the road and other public property following the requirements local officials.Water Sewer Tap - Preconstruction Planning - Insitebuilders
In some cases certified subcontractors or special permits are required, drawn by the contractor to show details for roadwork, curb cuts, and excavation because of safety concerns for injury during and after the installation. For example, shoring is required in unstable soil or for trenches more than 5 feet deep, along with railing and falsework for sidewalks, and silt barriers for erosion control.  

Tapping into the sewer and water mains 
Because of existing hydraulic pressures, special precautions must be made to tap into an active utility main and avoid interrupting service to current customers or damaging other utility lines during the installation. Hot taps like these for major constructions are made by specialists using a special clamp, bolted or welded onto the sewer or water main.
 

The clamp has a water tight collar and is engineered to seal the mainline. Once in place, the drill or cutting head is mounted to a series of valves that are then reset to remove the cutter and any debris before opening the flow to or from the building. The process can be competitive as you can see here.
Water Tap - Preconstruction Planning - Insitebuilders
Once the taps have been completed, shut off valves, back flow protectors, and meters are installed. The connections are then inspected and recorded, and the area backfilled and refinished according to public works specifications.
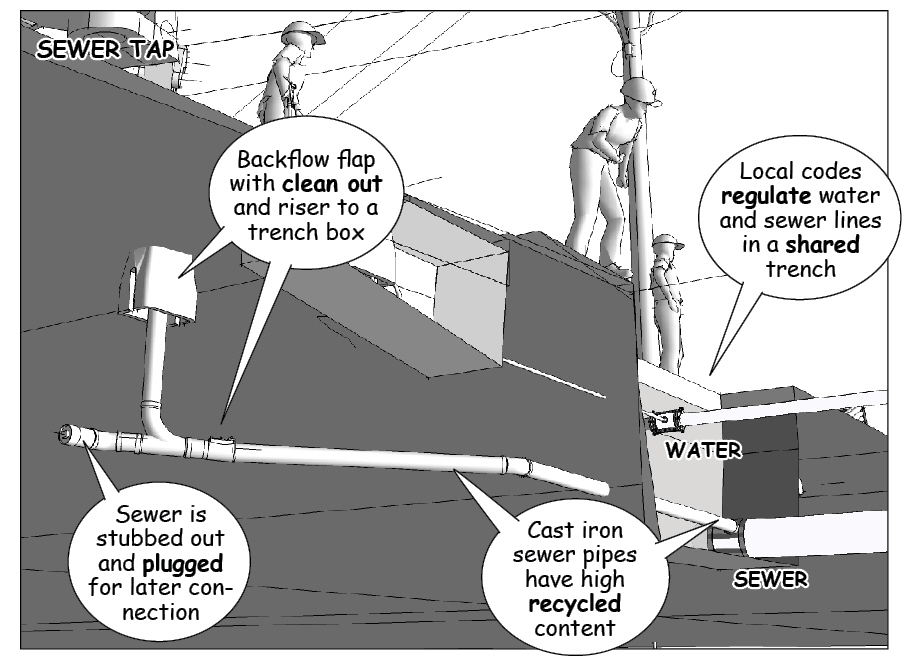
Site Utilities - Preconstruction Planning - Insitebuilders
Important is that the street, sidewalks, and any areas damaged by the work must be repaired or replaced. In most cases this means new sidewalks, curbs and gutters, as well as landscaping and vegetation that must be listed as line items in the costs shown on a construction contract.

Preconstruction Planning - Insitebuilders  
(To be continued…)

---------------------------  
The material presented in this series has been taken from our book, “How a House is Built: With 3D Construction Models” The book includes annotated illustrations, captioned text, videos, models, and the 2D Preliminaries. 
 Insitebuilders - How a House is Built

Tuesday, August 13, 2013

Part 6: Preconstruction: Health and Safety

(Introduction, Syllabus, 1.Prelims, 1-4Precon, 2. Excavation, 3.Foundation, 4.Framing, 5.Roof, 6.Close, 7.MEP, 8.Finish)

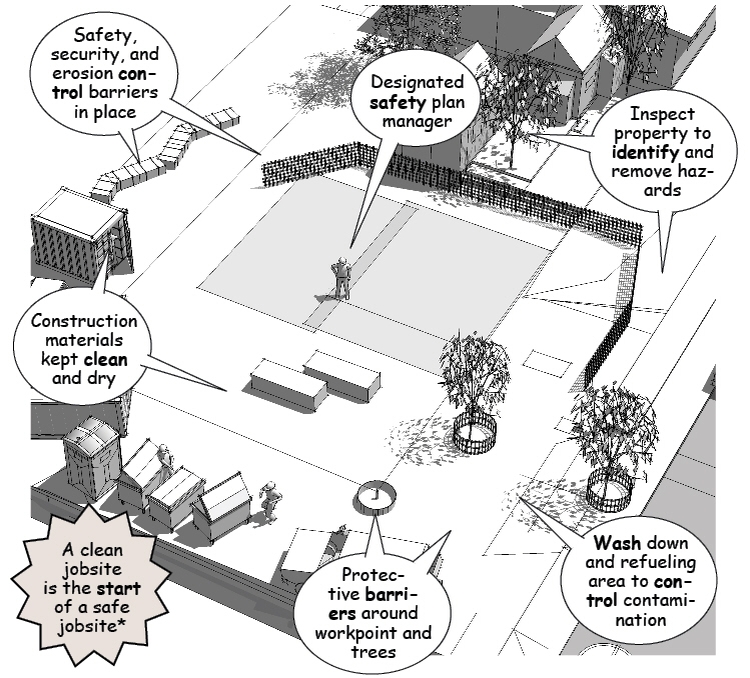
Startup activities begin with risk assessment and safety planning for each phase of the construction, once the workpoint and work and storage areas are determined on the SUP.  

Construction Health and Safety Plan
Skilled managers anticipate potential hazards by assessing risks for each phase of the construction. A safety plan is then drawn to identify challenging actions during the construction process, utility locations, potential hazards, environmental impact, and the location of field tests to determine soil conditions. 
Preconstruction Planning - Insitebuilders
On a large project, a safety plan manager is appointed to continually review operational risks, maintain safe practices, assess environmental impacts, and keep everyone on the jobsite aware of the importance of regulating health and safety.
Preconstruction Planning - Insitebuilders
Written safety plans are usually required by construction insurance carriers and are important to document pre-emptive planning in the event of an injury, subsequent law suit, and worker’s comp claims against the contractor and owners.

Startup Utilities for the Construction
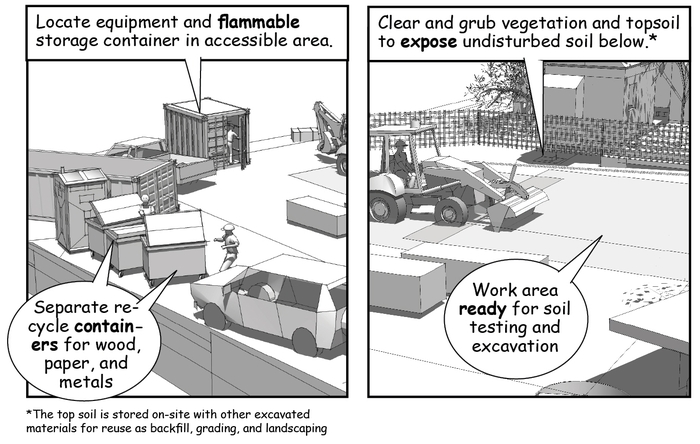
Once setbacks and work areas have been generally identified, utilities are located and marked for connection. Power is needed immediately to construct formwork and falsework to reinforce existing structures. Water is necessary to keep workers hydrated, dust control, and equipment wash-off.
Preconstruction Planning - Insitebuilders
Special concerns include overhead power lines, underground utilities, soil contamination and containment, water and erosion, and natural drainage patterns during construction.
Preconstruction Planning - Insitebuilders

Field Testing
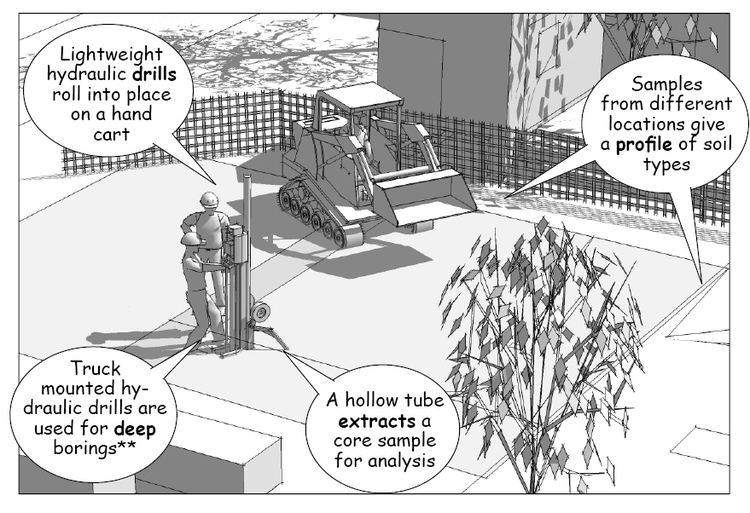
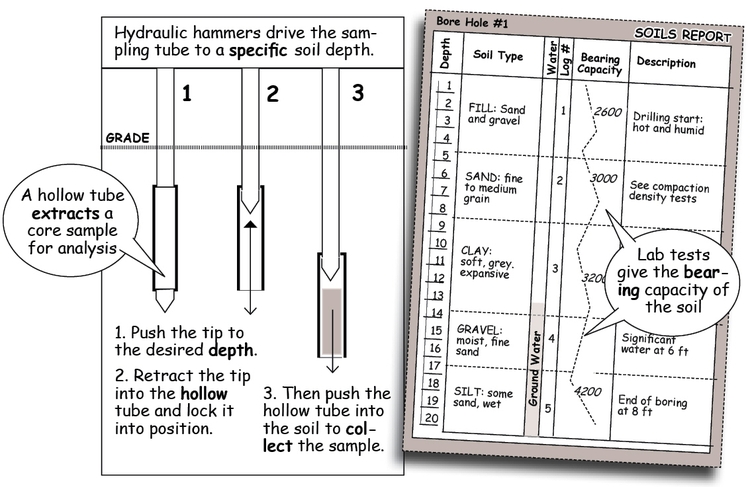
Soil tests determine bearing capacity and moisture content. Tests look for clay that could push up on the foundation and utility lines, as well as sandy soils that could shift or sink under the weight of backfill or the building.
Preconstruction Planning - Insitebuilders
These tests are important to construction planning because they disclose potential problems not only with the foundation for the building, but for slump and sluff factors that may require shoring for utility trenches and the walls of the building excavation.
Preconstruction Planning - Insitebuilders  

(To be continued…)
 
Preconstruction Planning - Insitebuilders
---------------------------  
The material presented in this series has been taken from our book, “How a House is Built: With 3D Construction Models” The book includes annotated illustrations, captioned text, videos, models, and the 2D Preliminaries.
Preconstruction Planning - Insitebuilders

Monday, July 15, 2013

Part 5: Preconstruction: Marshalling and Staging

(Introduction, Syllabus, 1.Prelims, 1-4Precon, 2. Excavation, 3.Foundation, 4.Framing, 5.Roof, 6.Close, 7.MEP, 8.Finish)

Preconstruction planning includes the environmental impact of the construction on neighbors, public safety, and noise-light-smoke-dust pollution and often required as a special condition for a building permit.  

Lines in space 
 Construction planning starts by physically transferring the lines and dimensions shown on a set of construction drawings to the actual real-world site conditions.
Preconstruction Planning - Insitebuilders
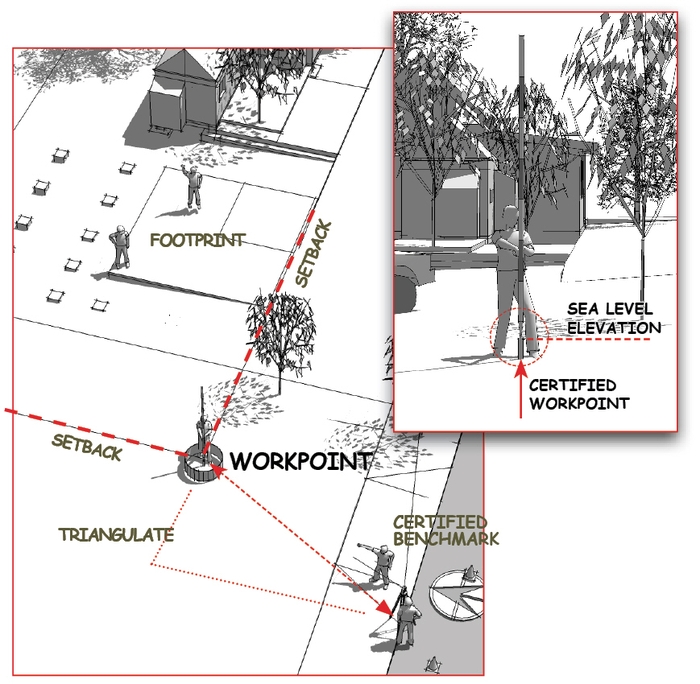
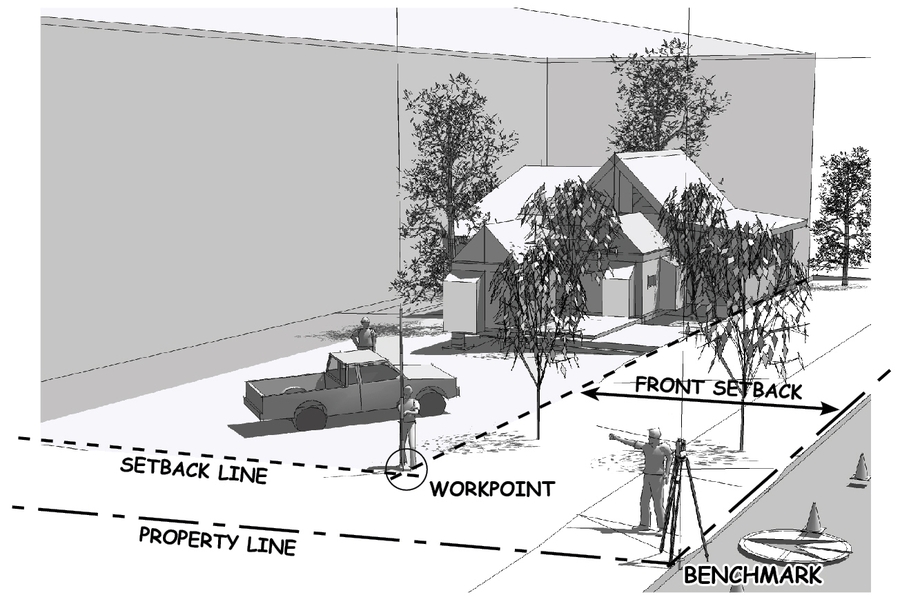
This is done with surveying instruments designed to locate points in space by triangulating distances from a workpoint. This workpoint is derived from geographic monuments and acts as a three-dimensional reference during excavation, foundation, framing, and site work.

Site Utilization Plan
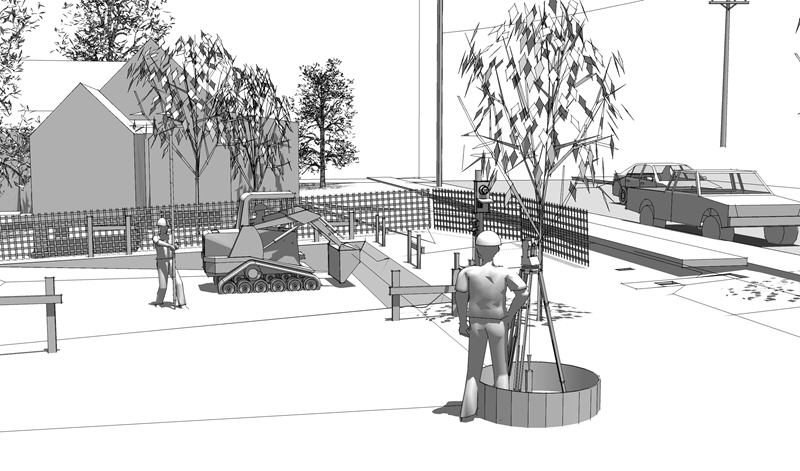
The workpoint is also the basis for a site utilization plan (SUP) drafted by the contractors. A SUP is used to think through each phase of the construction, identifying changing work areas, required falsework, safety concerns, site storage, environmental protection, access controls, parking, and traffic.
Preconstruction Planning - Insitebuilders
The plan itself can be a rough drawing, collaborative white board sketch, or a screen-shot from a simple three-dimensional model.
 Preconstruction Planning - Insitebuilders
The SUP is also the basis of a safety plan, startup site preparations, marshalling, support services, storage, staging, layout areas, and clearing and grubbing in preparation for excavation, grading, and site utilities.
Preconstruction Planning - Insitebuilders 
Once the site is prepared, the building’s footprint is laid out from the workpoint and used to locate soil borings to test and analyze the strength of the soil under the foundation. These borings determine ground water, bearing capacity, and soil type and are drilled early in the construction process in order to identify structural changes that might affect the depth or dimensions of the excavation.
Preconstruction Planning - Insitebuilders

(To be continued…)

---------------------------  
The material presented in this series has been taken from our book, “How a House is Built: With 3D Construction Models” The book includes annotated illustrations, captioned text, videos, models, and the 2D Preliminaries.
How a House is Built - Insitebuilders.com

Thursday, June 13, 2013

Part 4: Preconstruction: Orientation and Workpoint

(Introduction, Syllabus, 1.Prelims, 1-4Precon, 2. Excavation, 3.Foundation, 4.Framing, 5.Roof, 6.Close, 7.MEP, 8.Finish)

A building permit is issued directly to the builder and not the owner or designer. That means from the start of construction until the final certificate of occupancy, the area bounded by the property lines is the direct responsibility of the builder.
Part4: Construction Fundamentals - Plot Plan - Insitebuilders
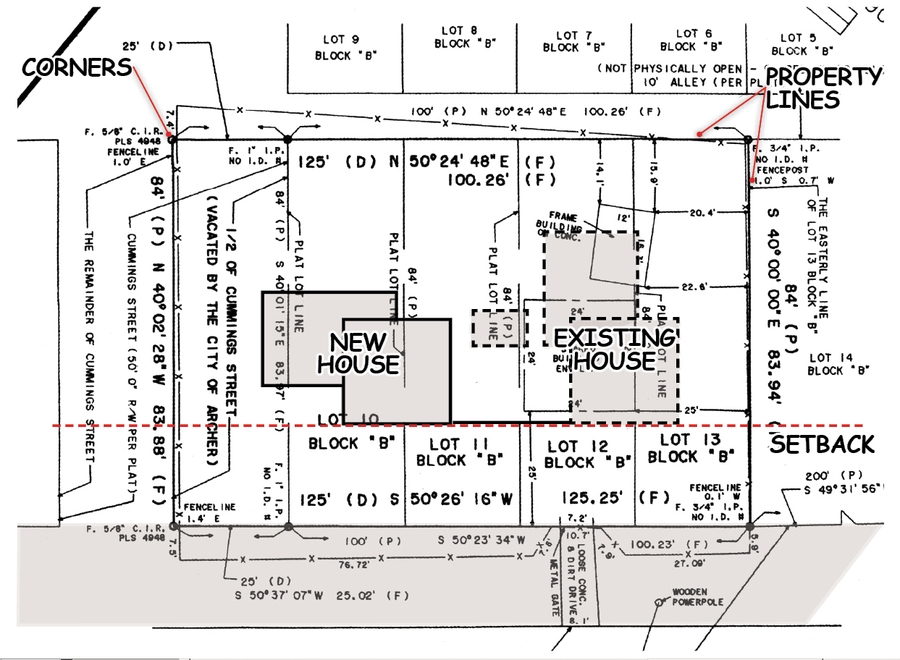
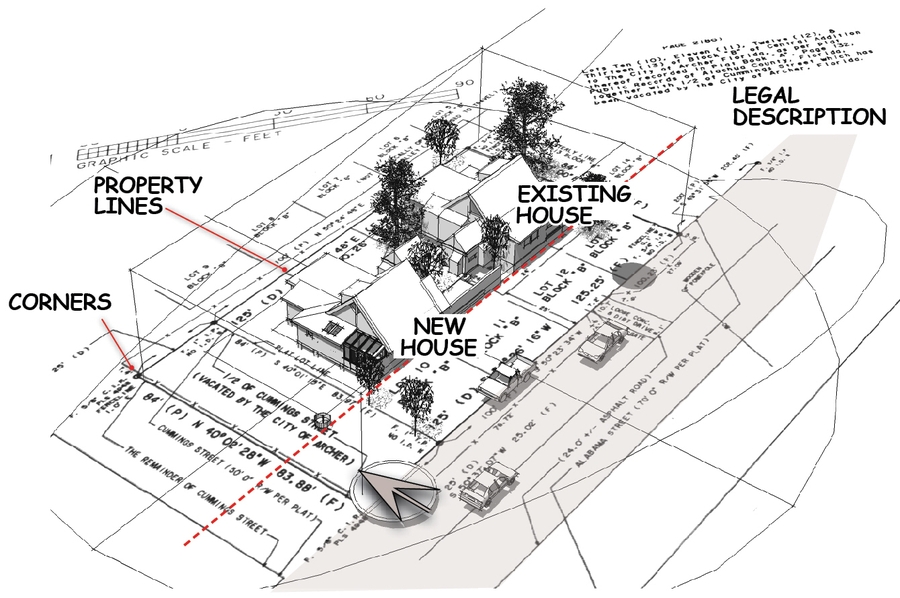
These property lines are drawn from recorded legal descriptions onto survey maps and civil engineering documents and staked out in the field by licensed surveyors using instruments that precisely locate the corners that will orient the construction. These corners are calculated according to sight lines and tangents from permanent benchmarks in the area.

Site orientation
Staking the property corners is important because anything that happens during construction, along with any equipment, drainage, noise, smoke, dust, or debris that crosses the property boundaries is governed by neighboring property rights and local building codes.
Part4: Construction Fundamentals - Plot Plan 3D - Insitebuilders
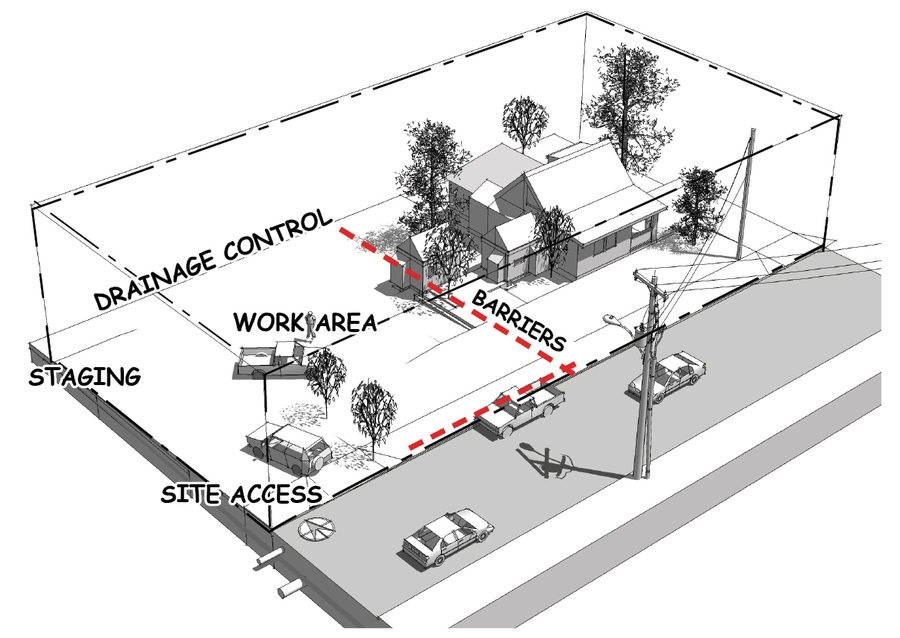
An experienced builder then starts construction by first meeting with neighbors and code officials to coordinate access points onto the site, staging areas for equipment, drainage and sediment controls for storm water erosion, and requirements for the protection of pedestrians and vehicular traffic during construction.
Part4: Construction Fundamentals - Work Area - Insitebuilders
These preconstruction preparations are especially important when sidewalk and utility easements are within the property lines, and therefore part of the jobsite, because the builder is responsible for all private and public property damage and safety.

Code violations
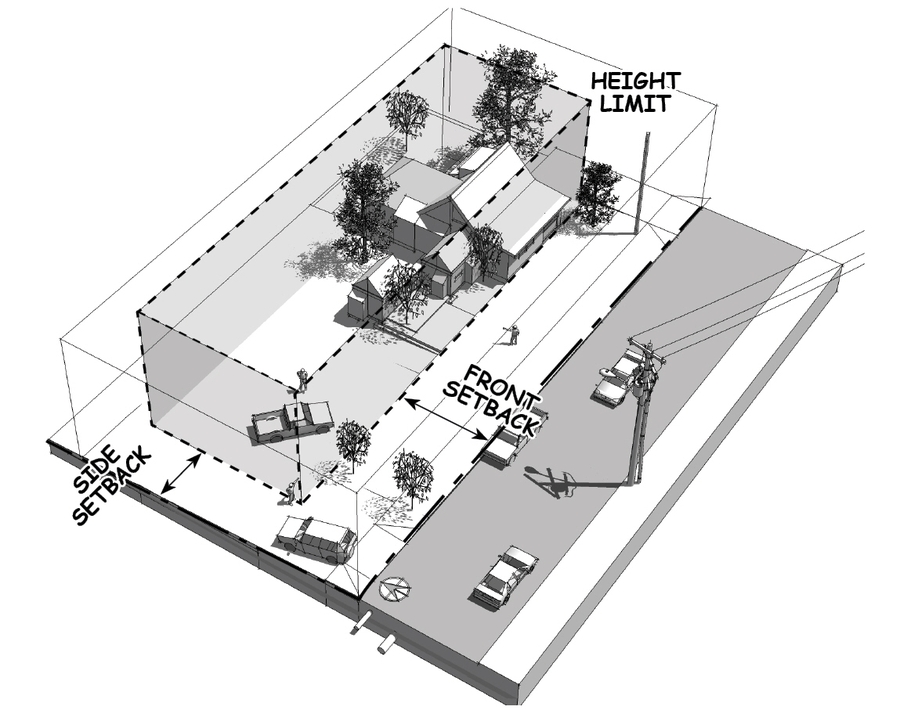
Height limits and setbacks from the property lines are set by the zoning codes that regulate land use. Even the slightest violation of height limits or misplacement into the setbacks will be cited as a code violation that could then trigger a stop work order, lengthy public review, and denial of a final certificate of occupancy for the completed building.
Part4: Construction Fundamentals - Building Code Box - Insitebuilders
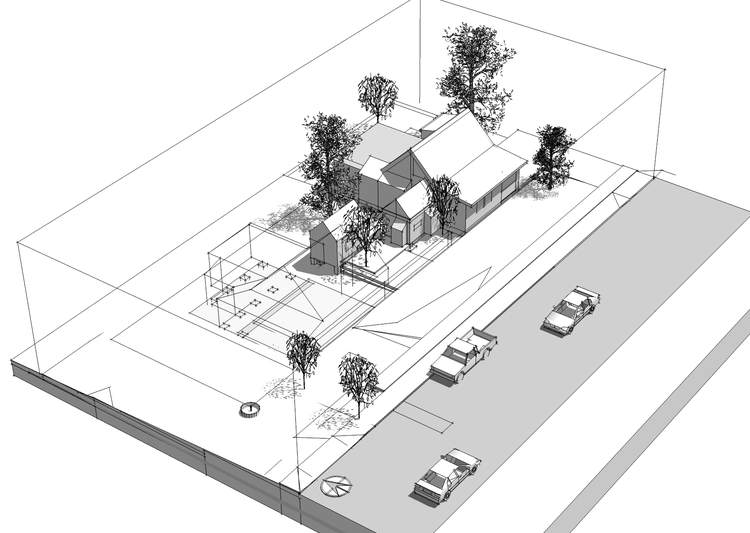
This means the completed building must fit within a three-dimensional box defined by the code. Liability for compliance makes it important that the setback lines, sea level elevations, and the footprint of the foundation be accurately located on the jobsite prior to construction. This includes the location and dimension of fence lines, driveways, curb cuts, roof overhangs, decks and stairs.  

The Workpoint
 As a reference during the construction, a temporary workpoint is located somewhere on the jobsite. The workpoint is a three-dimensional point in space that is measured parallel to the earth’s latitude and longitudes, and vertically calculated according to sea level elevations determined by the surveyors.
Part4: Construction Fundamentals - Workpoint Survey - Insitebuilders
In this way, the workpoint is available as a reference for the depth of the excavation, corners of the foundation, height of the building’s frame, the location and elevations of roads and driveways, and all underground utilities.
Part4: Construction Fundamentals - Protected Workpoint - Insitebuilders
Builders also use the workpoint to locate borings to test and analyze the strength of the soil. These borings determine the type of soil and its bearing capacity in order to verify the size of the footings for buildings with special foundation requirements.  

Here then is an overview of the jobsite

(To be continued…)
...........................
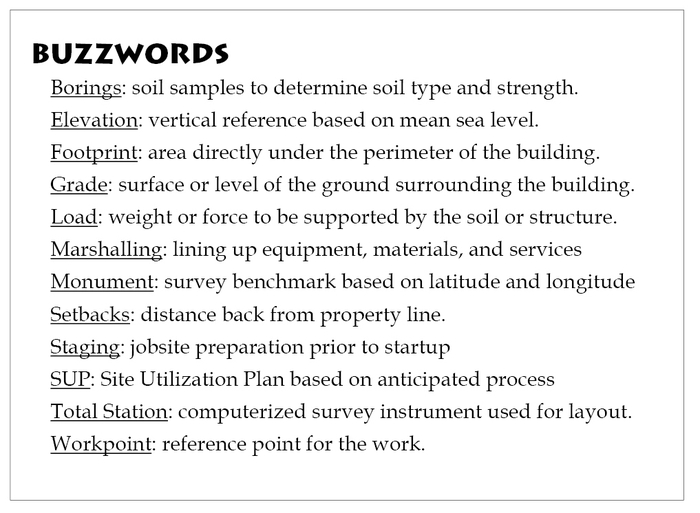
Part4: Construction Fundamentals - Buzzwords - Insitebuilders

---------------------------
The material presented in this series has been taken from our book, “How a House is Built: With 3D Construction Models” The book includes annotated illustrations, captioned text, videos, models, and the 2D Preliminaries. 
http://insitebuilders.com/
.


Thursday, May 16, 2013

Part 3: Preliminaries: Thinking in nD

(Introduction, Syllabus, 1.Prelims, 2. Excavation, 3.Foundation, 4.Framing, 5.Roof, 6.Close, 7.MEP, 8.Finish) 

The Preliminaries are a set of scaled plans, elevations, and sections – refined from conceptual sketches and schematics – that become the first drawings in a set of construction documents. These construction documents include details and specifications that become attachments to a legally binding contract and the basis of the building permit authorizing construction. In other words, the documents are drawn for lenders, attorneys, and code officials.
Insitebuilders - Projections
These drawings are drafted to a scale and format required by local building officials so that they can be referenced in a series of site inspections leading to a Certificate of Occupancy (CO). The CO is necessary to register the building as legal property, close loan agreements, and transfer the project as property to the local tax rolls.
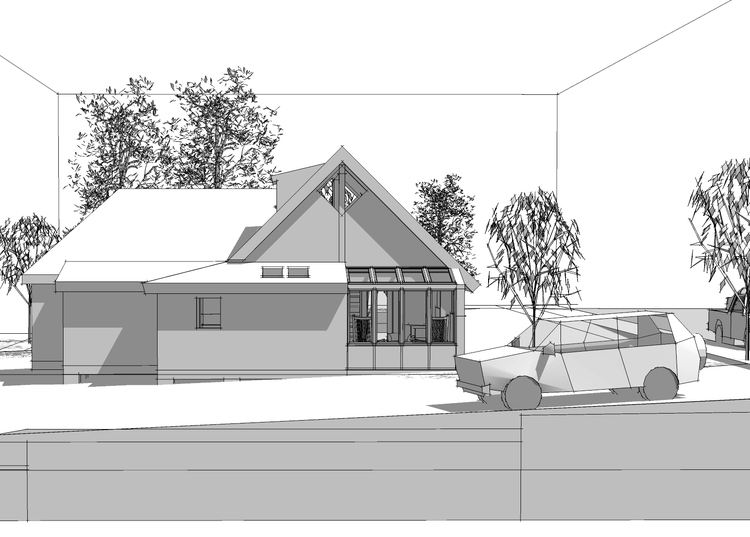
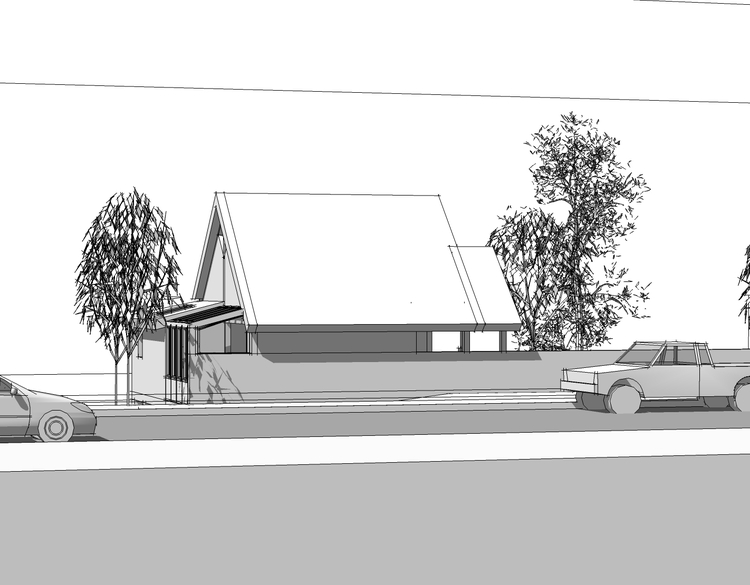
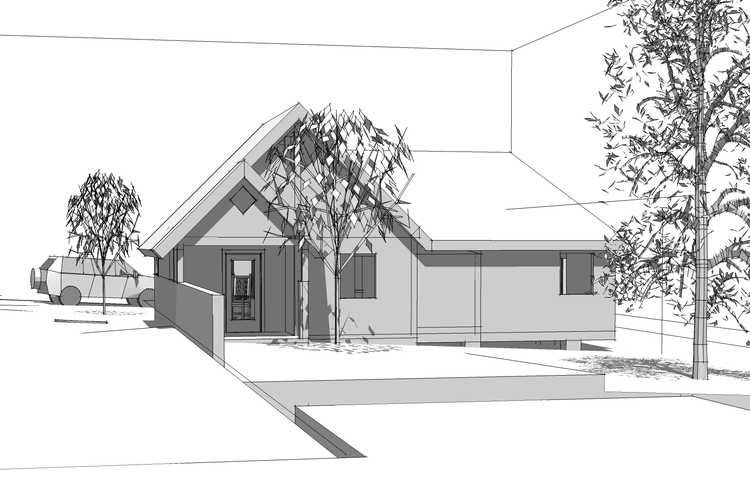
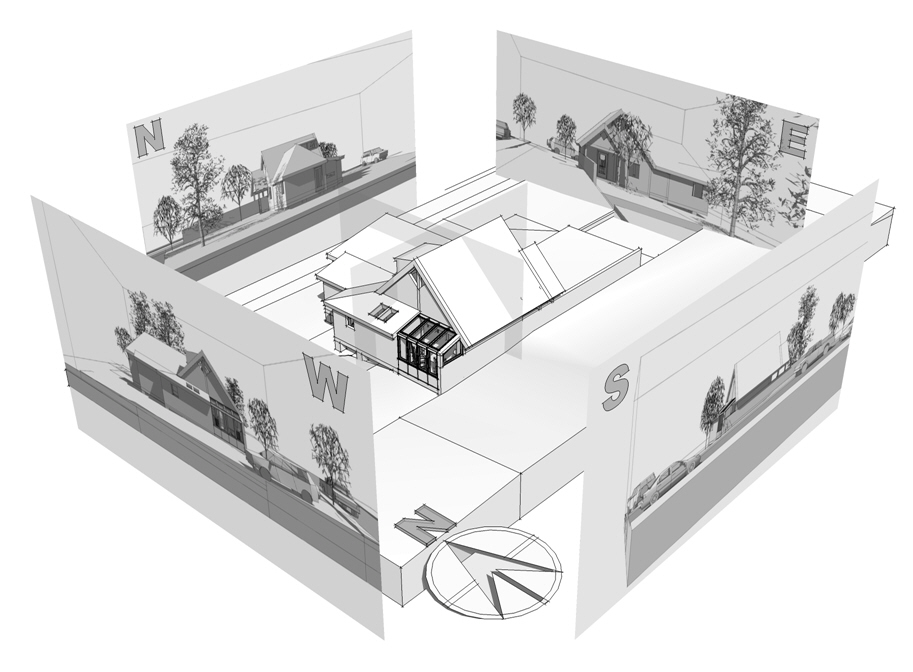
Insitebuilders: How a House is Built - West Elevation Insitebuilders: How a House is Built - South Elevation Insitebuilders: How a House is Built - East Elevation Insitebuilders: How a House is Built - North Elevation 
The challenge for designers and builders on both sides of these contract documents is that a multidimensional process must be reduced to a collection of two-dimensional diagrams, symbols, signs, and notes. This limits the designer’s ability to suggest operational details for the construction and forces builders to translate abstract images into actions that are much more involved than two or even three-dimensional interpretations.

It’s not rocket science
Shape and form may have a place for some, but what’s most important to a builder is process. In construction, process is “means and method.” It’s how a particular builder intends to actually put the building together and what makes one builder more competitive than another.
Insitebuilders: How a House is Built - Southwest View 
What’s important here is that seasoned builders can estimate the cost of construction by simply looking at the Preliminaries without carefully thinking through either means or method. To do this, builders apply a rule of thumb, or unit cost based on current market conditions and their own experience with similar buildings. If there’s anything unusual they simply adjust their prices intuitively. Insitebuilders: How a House is Built - Jobsite
Estimating by unit cost is only possible because every trade on the project uses their own rule of thumb. Carpenters and finish workers count square footages, masons yards, cabinet makers linear feet, plumbers fixtures, and electricians count outlets.

This seemingly relaxed approach to estimating the cost of construction follows a time not long ago when builders worked without the formalities of plans and specifications. Castles were built from oil paintings, high-rises from inked linen, and builders as designers were confident that they could figure things out as they went along. Today of course, this openended approach sets the stage for trial and error, conflicts and conditions, and corresponding cost overruns and delays.

Insitebuilders: How a House is Built - Layout Model 
But the point is that the cost of construction can be determined from the Preliminaries without carefully considering either means or method because the details, notes, and specifications in the contract documents for most buildings follow standard practices. That’s why CAD files, boiler plates, and sticky-backs can be cut and pasted from one set of drawings to another. Construction is not rocket science.
Insitebuilders: How a House is Built - Loft Cut Away  

Self-evident simulations
What you’ll see in this house then is not that its construction is so difficult, but that it’s so far removed from the norm. I designed the house to combine a number of different construction practices. This includes a variety of field conditions that are similar on many projects – residential or commercial, wood or steel, but the building itself is atypical and would be a challenge for most builders to build.
Insitebuilders: How a House is Built - Section South 
 Insitebuilders: How a House is Built - Section West
Because the process drifts so far from previous experience, it enters unfamiliar territory for each of the trades involved in its construction, requiring additional management and attention that cannot be easily broken down into a unit cost.
Insitebuilders: How a House is Built - Solarium 
What’s interesting is that a quick glance at the illustrations shown here are also sufficient for us to start a virtual construction once a few dimensions are clarified in the field (next article). What this means is that process can be simulated when we think through the assembly of this house in a piece-based construction model in almost the same way it was once done by early masterbuilders.
 Insitebuilders: How a House is Built - Foundation Layout 

As such, construction models suggest an interactive document that might better serve builders working with the variables of the real world. What such a document might look like as a contract remains to be discovered, but the idea of using multidimensional programs like SketchUp to represent each step in the construction of a building is exactly the point of this series of articles.

---------------------------
The material presented in this series has been taken from our book, “How a House is Built: With 3D Construction Models” The book includes annotated illustrations, captioned text, videos, models, and the 2D Preliminaries.

 Insitebuilders - How a House is Built - Cover  

(To be continued…)
.

Wednesday, April 17, 2013

Hands-On Construction 101, Part 2: Syllabus

(Introduction, Syllabus, 1.Prelims, 2. Excavation, 3. Foundation, 4.Framing, 5.Roof, 6.Close, 7.MEP, 8.Finish)

WARNING: Working With Codes
There are at least two distinct regulatory codes that govern the construction of even the smallest and simplest house. The first is the planning and zoning code and the second is a local variation of the international building code. Both are enforced by police powers.

The planning code is the product of a land use plan that attempts to project growth and anticipate the needs of the people in a community. Zoning maps are part of this code. They set the conditions for construction on every piece of land within the local jurisdiction. This includes setbacks for the buildings on the property, density and use, height limits for the construction, off-street parking, and land-use requirements. PermitsProtect.info
Once a project is approved by the planning department, a building department issues a building permit according to ordinances specified in the local building code. Building codes are technical ordinances that govern materials, methods, structure, fire safety, and the energy performance of a building. The mandate of this code is to ensure the health, safety, and welfare of current and future occupants of the building.

There’s a lot more information on codes and the permit process in our book: A Small Home of Your Own: Plan Permit Pay in 3D.
A Small Home of Your Own: Plan Permit Pay in 3D - Insitebuilders
What’s important for constructors is that once a permit is issued, the responsibility for code conformance remains with the contractor (long after the project is finished). That means, the construction process actually begins with the preliminary plans – though few understand the importance of these early reviews.  

Eight Construction Phases to Cover in this Series
The trick to working with these codes is therefore to thoroughly understand their requirements before beginning construction. This means early reviews by building officials, identifying areas of concern, and detailing the criteria for inspections and approvals.

Phase 1: Preliminaries - Insitebuilders
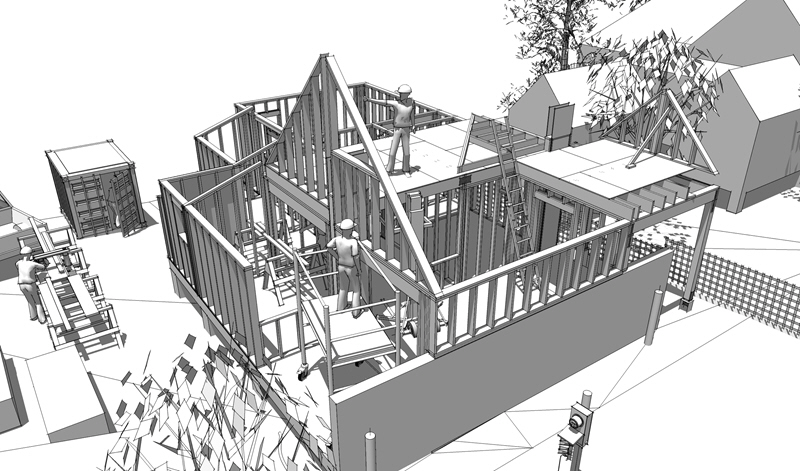
1. Preliminaries: The postings in this phase will introduce the small, simple, and sustainable house that will be constructed in the next seven phases. This house is specifically designed to incorporate as many alternatives in construction detailing as possible. It is built on a raised foundation with open ceilings that encourage access for modification and maximize the use of interior space.

Phase 2: Excavation - Insitebuilders
2. Excavation: Excavation begins with a series of postings beginning with a surveyed layout of the setbacks and footprint of the house. A SUP for the house includes locating utilities and making connections to the building services. A workpoint and batterboards are then placed to reference boundaries, depth of the excavation, and guide the equipment that will prepare the site for the foundation.
Phase 3: Foundations - Insitebuilders
3. Foundation: The batterboards are used to layout the formwork for foundation footings and stem walls. Reinforcing is placed in the formwork before concrete is poured. Fabric footings are shown as a simple alternative to traditional methods. Masonry stem walls are tied to the footings with steel reinforcing. The concrete block is laid in courses up to the bottom of the framing sill plate.

Phase 4: Wall Framing - Insitebuilders
4. Wall Framing: The wall framing postings will begin with sill plates bolted to the top of the stem walls. These plates anchor the raised floor framing with structural connections that run to the wall and roof framing above. The exterior walls are installed using wider studs for thicker insulation. Non-bearing interior walls divide the house into usable spaces. Top plates tie the wall framing together.

Phase 4: Roof Framing - Insitebuilders
5. Roof Framing: Open roof framing is the critical part of this house not only because it presents the greatest risk for falls and injury, it also lifts the profile of the structure into winds that will impose the strongest lateral loads on the house during construction. This chapter details the placement of rafters and ridge beams using structural connectors that are integral parts of the structural system.

Phase 5: Roof Framing - Insitebuilders
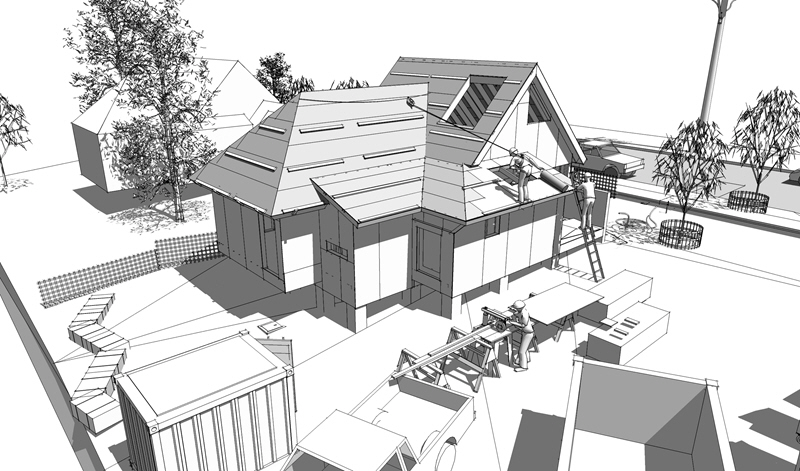
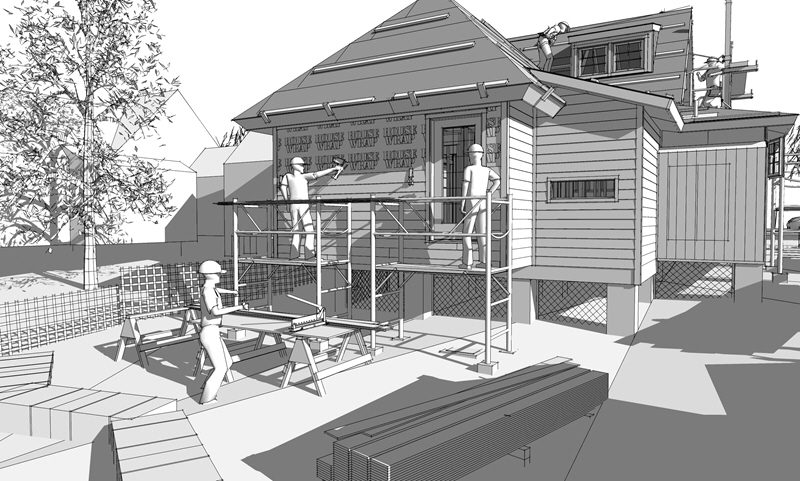
6. Close-In: As soon as the roof framing is complete, the race is on to close-in the house and minimize exposure to the weather. With careful scheduling and management, a number of interrelated tasks must be completed at the same time. These include finalizing framing, installing vapor barriers, doors and windows, siding, and the flashing and roofing.

Phase 6: Mechanical Electrical Plumbing - Insitebuilders
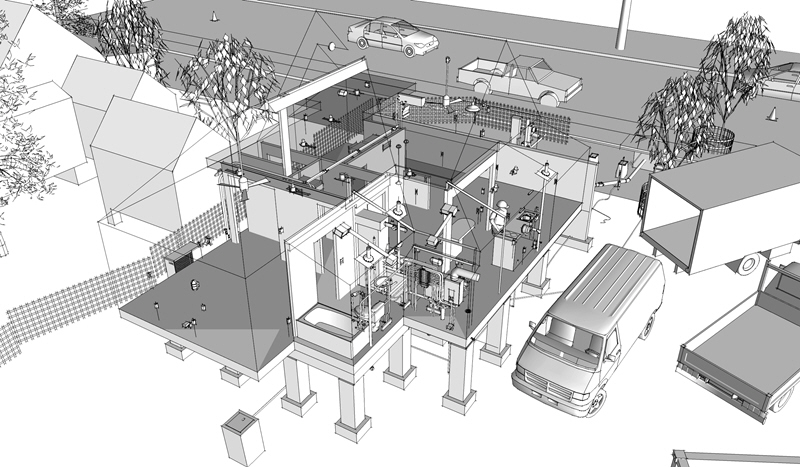
7. Building Systems: MEP building systems are the heart and soul of the house. Plumbing systems supply gas and water and remove waste; heating, ventilating, and air conditioning equipment provide warmth and cooling comfort; and the electrical systems deliver the power necessary to support the receptacles, lights, appliances and security for the house.

Phase 8: Finishes - Insitebuilders
8. Interior Finishes: The last chapter in our book “How a House is Built” uses a variety of electronic formats to illustrate the installation of sitework, insulation, drywall, cabinets, and system finishes. This is one of our earliest eBooks and is accessed online through the book’s CD. Some of the content will be reproduced here to demonstrate how we Export and use animations and illustrations from SketchUp models.  

Except for scattered notes and comments, almost all of the material to be presented in this series has been taken from our book, “How a House is Built: With 3D Construction Models,” including a few of the book’s illustrations, captioned text, videos, and models.  

See also the last pages of the April 2013 issue of the CatchUp Newsletter 18 < http://srv.ezinedirector.net/?n=6507149&s=127254939 >  

(To be continued…)
.