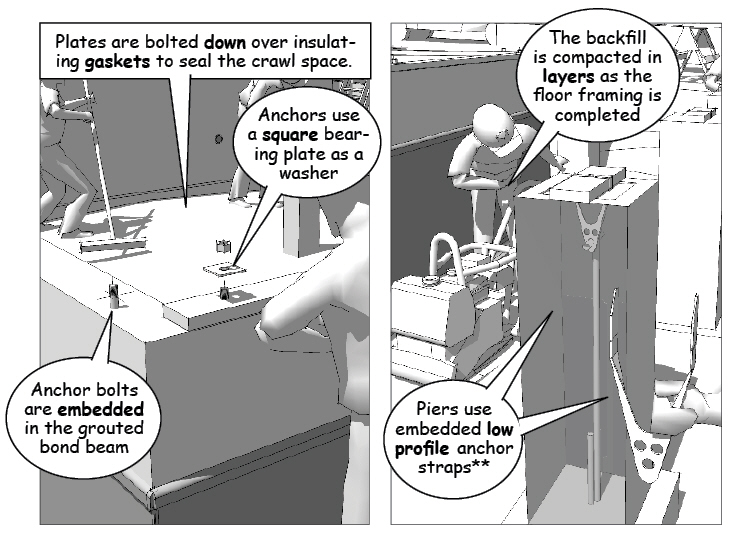
To begin framing the floor the top of the foundation stem walls and piers are first cleared of debris and any pockets in the reinforcing filled with grout to seal the surface. This includes wire brushing the anchor bolts to remove concrete or rust and make it easier to secure nuts and washers as the plates are drilled and fitted, flush to the outside face of the foundation wall.
Setting the sill plates
These sill plates serve three purposes. The first is to provide a uniform working surface along the top of a level stem wall, shims should not be necessary depending on the skill of the masons.
The second reason for the sill plates is to protect the framing from deterioration due to moisture and insect infestations. Redwood and other insect resistant woods were once used, but the availability of these materials has been seriously depleted, making their use impractical for most modern constructions.
Instead, a non-arsenic chemical solution is drawn into wood fibers under pressure to protect it from moisture and oxidization. Micronized copper is added to this chemical to act as a termite barrier, reducing the possibility of rot and insect damage, see www.ufpi.com.
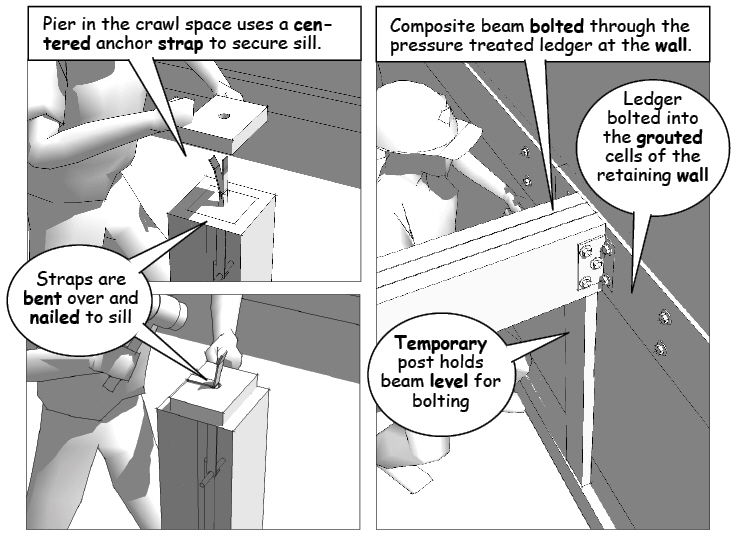
Most importantly, the sill plates act as a bearing surface for the framing members that rest directly on the stem wall. The wood sill then absorbs the weight of the building and ties the framing to the foundation. Simpson Strongtie has a complete line of structural anchors with uplift load limits, see www.strongtie.com.
The sill plates are structural members
With the sill plates securely anchored and the drains and moisture protection installed, backfill is placed to provide a safe working surface around the foundation. It’s important that the backfill not add soil pressure high up on the wall until the floor framing is finalized. Once in place, the floor adds lateral strength to the top of the wall.

Safety is again the number one concern on a professional jobsite. For this reason the framing team begins their work by setting up a designated cutting zone and a lay down area to stage cut materials. The work zone must be close enough to the carpenters so that they can call out dimensions and variations as they measure and place the joists and girders.
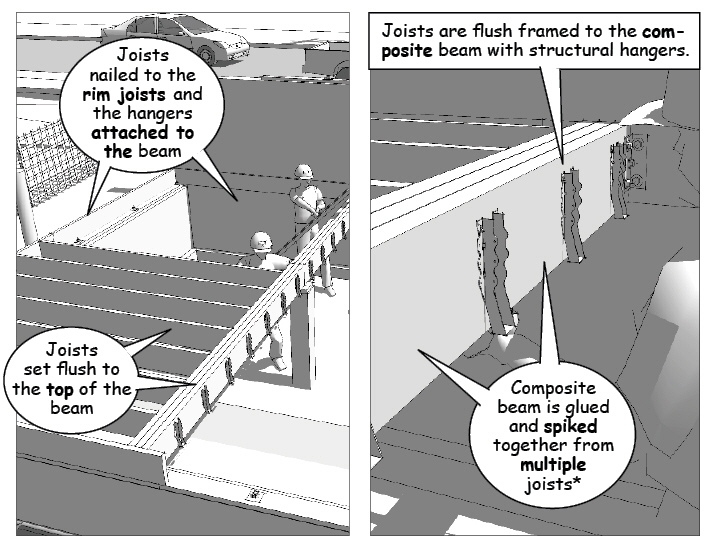
Composite beams are glued and spiked together from standard milled materials according to engineering calculations. Field fabricating girders and beams in this way reduces the need for handling and transporting larger framing members.
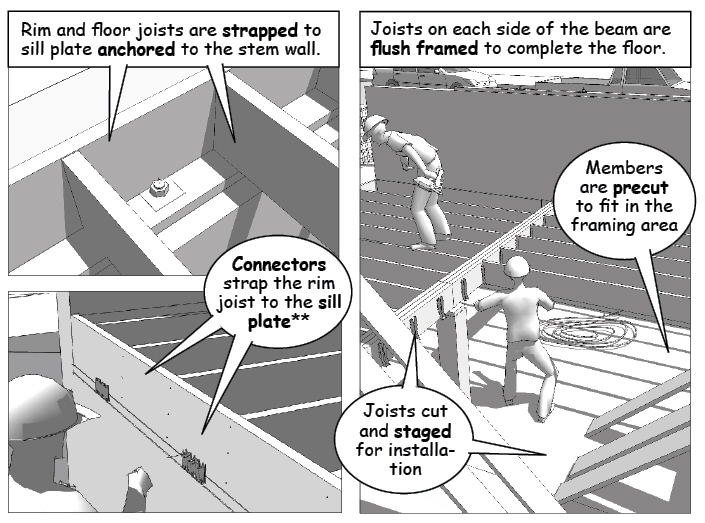
The joists are fitted into hangers to be flush with the top of the composite girders. Flush framing adds height to a basement or crawl space making it easier for mechanical and electrical contractors to access the underside of the floor.
Note that straps, clips, and anchors work together to tie the frame to the foundation and counter uplift loads. Earthquake and hurricane regions require structural connections engineered according to the environmental loads imposed on the building.
(To be continued…)
---------------------------
The material presented in this series has been taken from our book, “How a House is Built: With 3D Construction Models” The book includes annotated illustrations, captioned text, videos, models, and the 2D Preliminaries.

