Once the perimeter walls are in place and the first floor platform is secure, the interior walls are ready to be installed following the layouts shown on the floor plan.
Assembling the interior walls
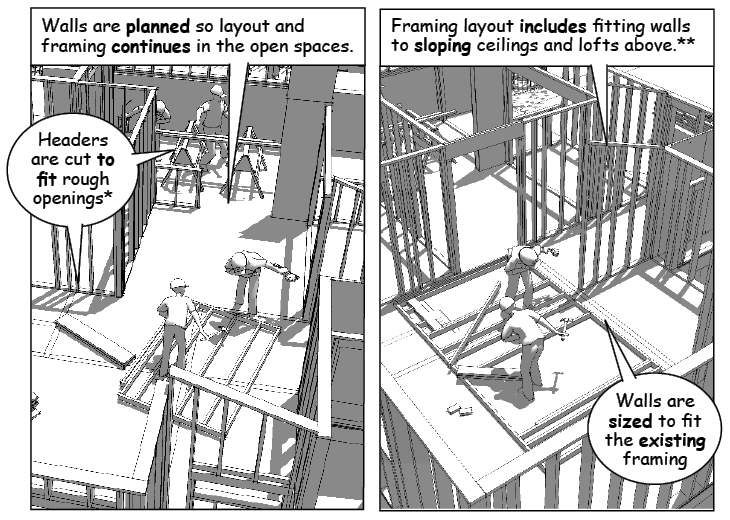
Field carpenters determine the order of installation for the walls based on the working space available for assembly. Keep in mind that the chalklines on the subfloor mark the location of walls and top and bottom plates have already been cut to fit the line intersections.
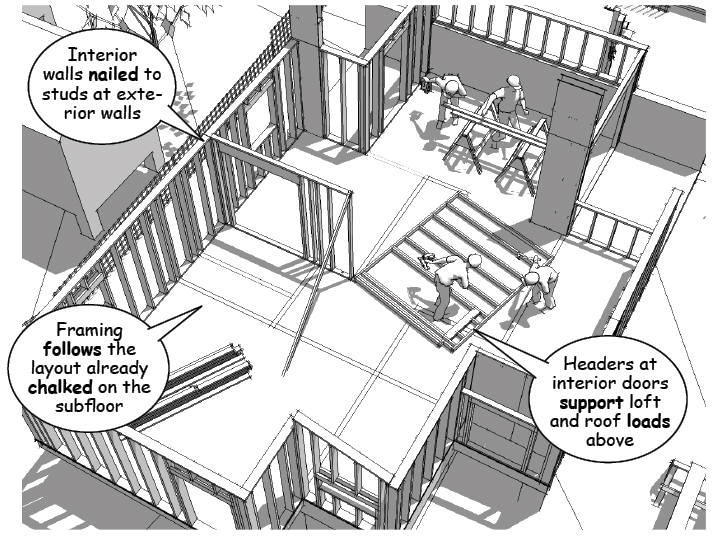
Schedules found on the construction documents list rough openings for the doors and windows. Header sizes for these openings vary with the span and the loads from the upper floor and roof framing. Structural headers and supporting columns that must be extended to the foundation are noted on the construction documents for special consideration.
Bottom plates framed into the walls at the threshold of all the openings are cut after the double top plates for the upper floor framing have been finalized.
Filling in the details
Connections at the intersection of wall corners and end points are especially critical to stabilize the wall framing. The floor plan shows the location of the walls, but field crews determine how they interlock to prevent stress cracking once the interior materials are in place and finalized.
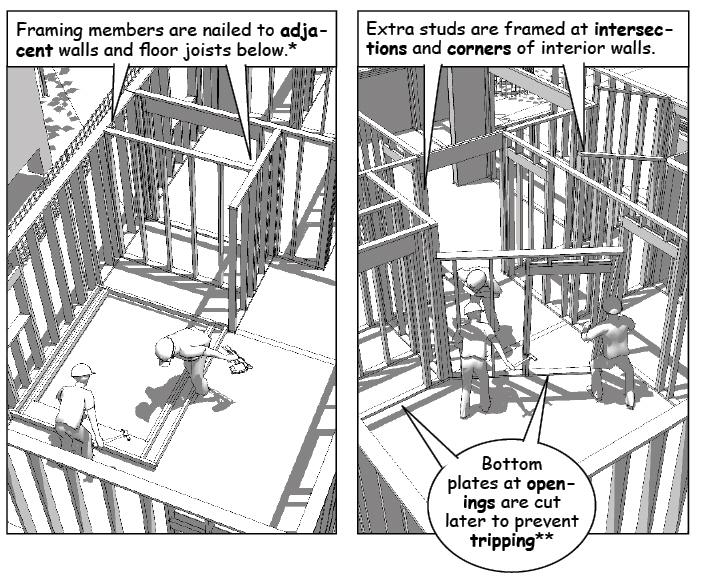
The bottom plates of the walls that run perpendicular to the floor joist are nailed through the subfloor into the top of each supporting joist. When the walls run parallel to the joists, additional blocking may be required to prevent deflection.
Lead carpenters are particularly aware of the need for blocking between the floor joists for columns, posts, and bearing walls. Solid blocking provides full bearing for structural loads that must be transferred from the upper floor and roof framing to the foundation.
Finalizing first floor wall framing
Once all the interior walls are in place, they are checked for proper nailing and structural integrity. The construction documents are used to check for missing connectors and excess nailing at the plates and studs. Too many fasteners or missing connections reduce the strength of the overall frame.
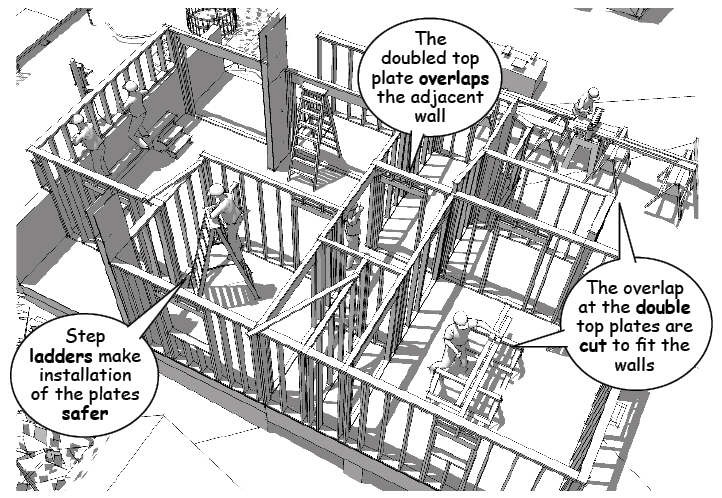
When tie down straps and structural connectors are finalized the lower floor framing is ready to be tied together with the doubled top plates. Placement and specifications for these connectors vary with local conditions, see the National Association of Home Builders resources at http://www.toolbase.org for design guidelines.
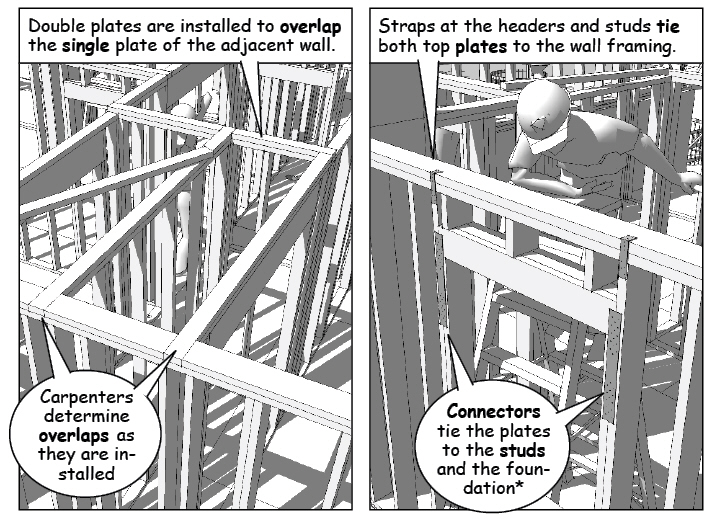
The top plates are installed to lap over adjacent walls so that they lock the framing together as a single structural unit. The additional top plate also strengthens the span between the studs making them less likely to deflect under loads from the upper floor and roof framing.
(To be continued…)
---------------------------
The material presented in this series has been taken from our book, “How a House is Built: With 3D Construction Models” The book includes annotated illustrations, captioned text, videos, models, and the 2D Preliminaries.

.
