(Introduction, Syllabus, 1.Prelims, 1-4Precon, 2. Excavation, 3.Foundation, 4.Framing, 5.Close-In, 6.Roofing, 7.MEP, 8.Finish)
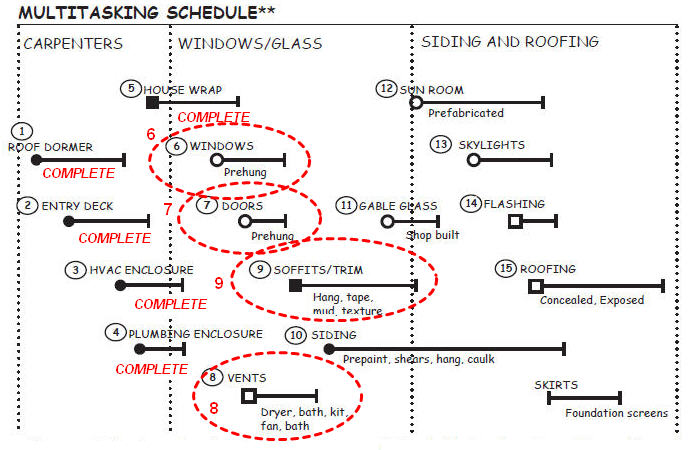
There are 15 tasks shown in the close-in phase for this example. Depending on the project and local conditions, many of these tasks must be completed sequentially. But others are often installed simultaneously.

The key to scheduling the work is to assess potential equipment or material conflicts, safety concerns, and local conditions. Poor scheduling will cause delays for subcontractors, and the workers assigned to different teams.
In most cases, the doors, windows, soffits, and trim are installed before the siding, but in some cases the weather will make it important to install the roofing before any of the other close-in tasks. In this example, the rolled roofing underlayment is sufficient to temporarily seal the interior.
Setting the Door and Windows
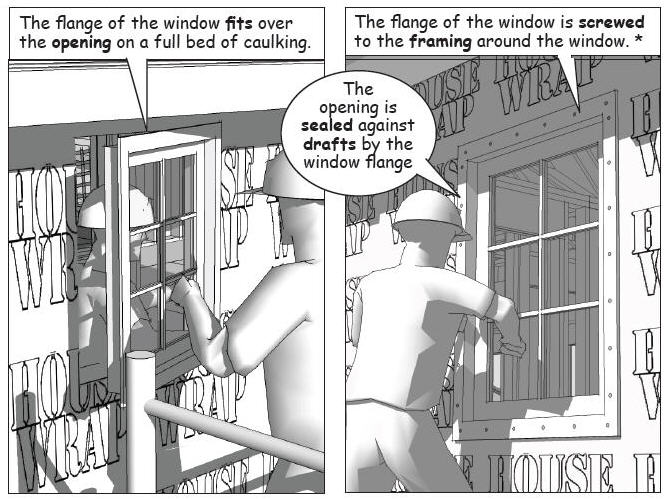
Windows are manufactured with an edge flange that is screwed to the rough framing around the wall opening. Wind loads determine the number of screws used along the sides of the door or window and are specified by local building codes or the project engineer.
Windows are manufactured with an edge flange that is screwed to the rough framing around the wall opening. Wind loads determine the number of screws used along the sides of the door or window and are specified by local building codes or the project engineer.
Energy codes require doors and windows to be certified by the manufacturer to guarantee that they meet energy ratings for the glass and frame.
Insulating tape, similar to that shown on the familyhandyman website are installed along the sill and sides of the door and window openings before the units are set in place. Once secure the perimeter of the door and window frames are taped to complete the installation.
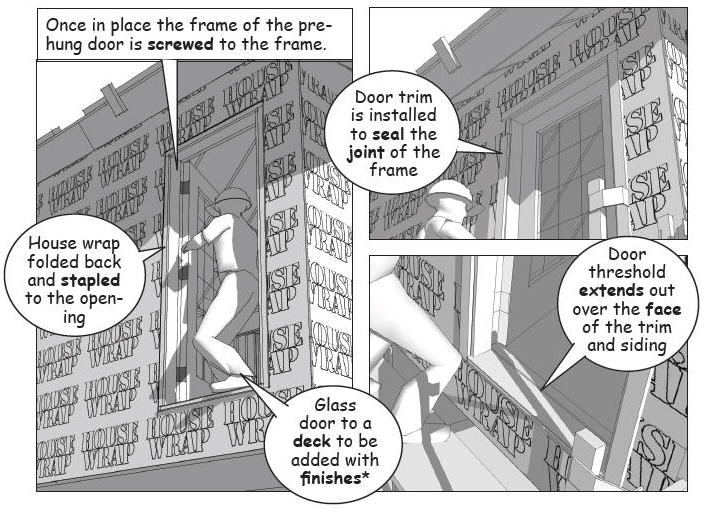
When weather conditions are extreme, metal “Z” flashing further seals the door and window frame to prevent moisture penetration.
Note that building codes require tempered glazing for glass doors and adjacent windows whenever inadvertent impact might occur.
Cement Fiber Trim to Match Siding
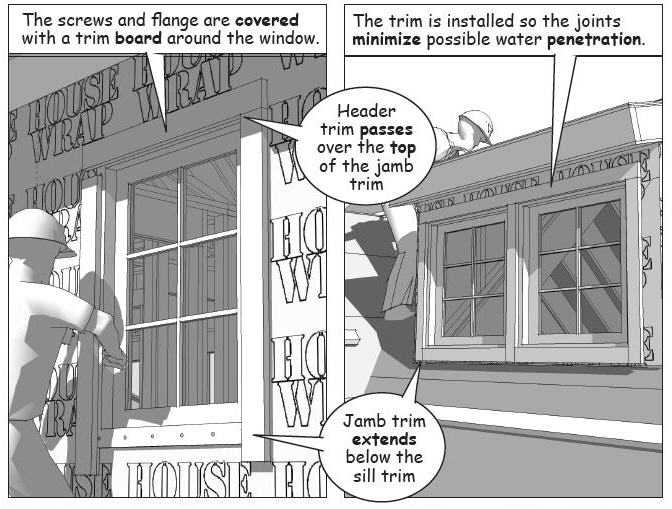
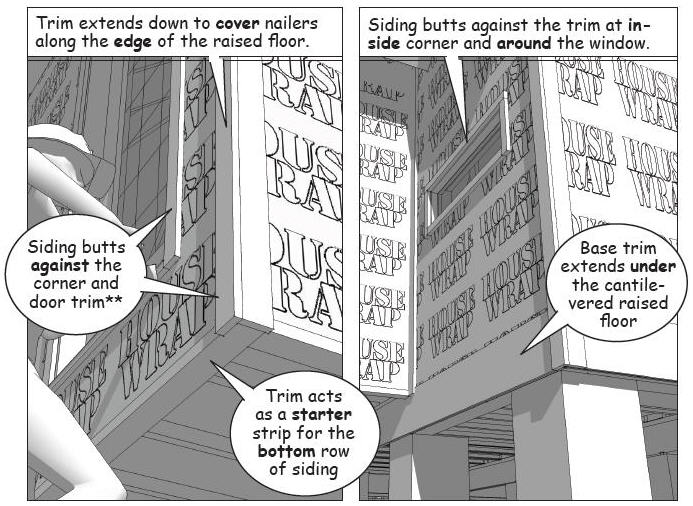
In this example, fiber cement boards are nailed to the framing at the corners, lower edges of the outside walls and around the door and window frames. For life-cycle and maintenance information on fiber cement trim and siding, see www.jameshardie.com.
The trim above the header spans the full width of the door or window frame and the horizontal joint is caulked to the vertical trim of the jambs.
Bathroom, dryer, and plumbing vents that penetrate the outside walls and the roof are coordinated with the mechanical subcontractors and completed before the siding is installed.
(To be continued…)
---------------------------
The material presented in this series has been taken from our book, “How a House is Built: With 3D Construction Models” The book includes annotated illustrations, captioned text, videos, models, and the 2D Preliminaries.
.
